Honda CR-V: Maintenance Under the Hood / Maintenance Items Under the Hood
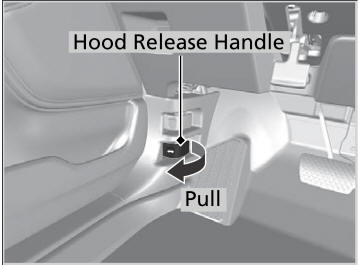
Opening the Hood
- Park the vehicle on a level surface, and set the parking brake.
- Pull the hood release handle under the
lower left corner of the dashboard.
- The hood will pop up slightly.
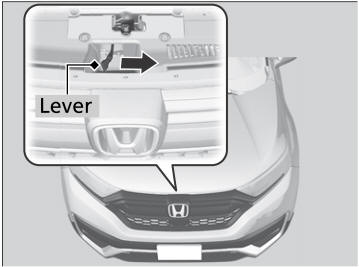
- Push the hood latch lever (located under
the front edge of the hood to the center) to
the side and raise the hood. Once you have
raised the hood slightly, you can release the
lever.
- Remove the support rod from the clamp
using the grip. Mount the support rod in
the hood.
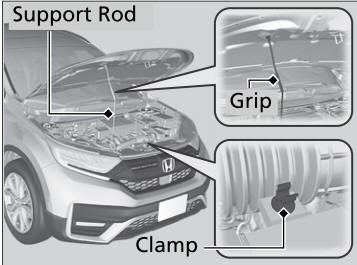
When closing, remove the support rod, and stow it in the clamp, then gently lower the hood. Remove your hand at a height of approximately 12 inches (30 cm) and let the hood close.
WARNING
The hood support rod can become very hot due to heat from the engine. To ensure against possible burns, do not handle the metal section of the rod: Use the foam grip instead.
NOTICE
Do not open the hood when the wiper arms are raised. The hood will strike the wipers, resulting in damage to the hood and/or the wipers.
When closing the hood, check that the hood is securely latched.
If the hood latch lever moves stiffly, or if you can open the hood without lifting the lever, the latch mechanism should be cleaned and lubricated.
Do not open the hood while the Auto Idle Stop function is activated.

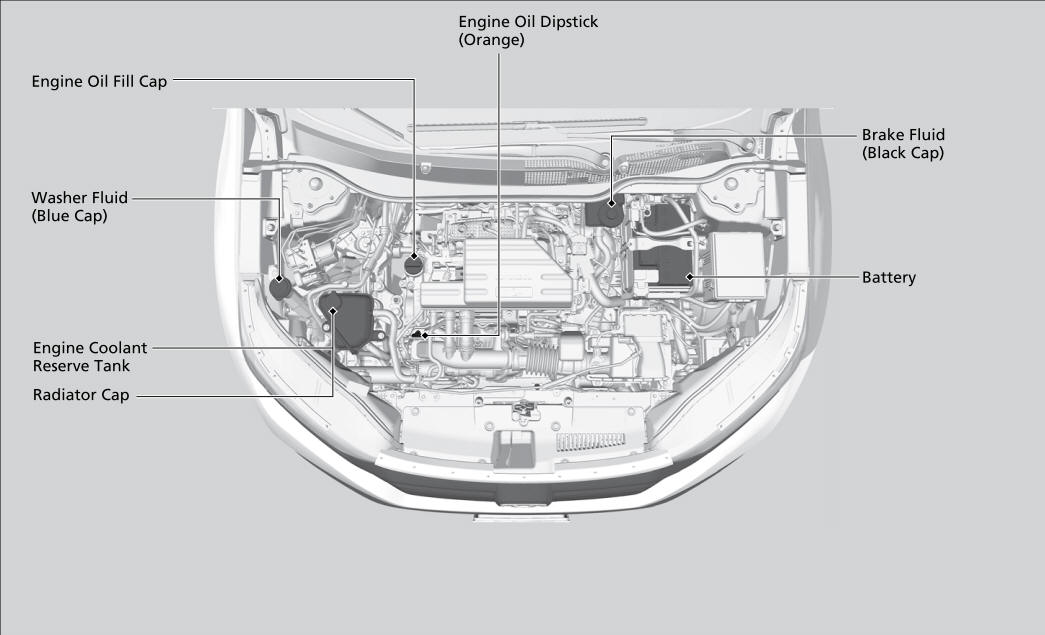
 Recommended Engine Oil
Honda Genuine Motor Oil
Premium-grade 0W-20 detergent oil with an API Certification Seal on
the
container.
Oil is a major contributor to your engine's
performance and longevity...
Other information:
Honda CR-V 2017-2026 Owner's Manual: Phonetic Modification
Add phonetic modifications of difficult or foreign words so that it is easier for SBV to recognize artists, songs, albums, and composers in voice commands when searching for music on the USB flash drive or iPod. Select . Select Settings. Select System...
Honda CR-V 2017-2026 Owner's Manual: Rear Seats
Adjusting the Seat Positions Once a seat is adjusted correctly, rock it back and forth to make sure it is locked in position. Folding Down the Rear Seats Store the center seat belt first. Insert the latch plate into the slot on the side of the anchor buckle...
Categories
- Manuals Home
- Honda CR-V Owners Manual
- Honda CR-V Service Manual
- Jump Starting Procedure
- Display Setup
- Front Sensor Camera
- New on site
- Most important about car
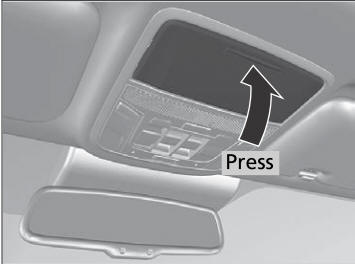
Sunglasses Holder
To open the sunglasses holder, press and release the indent. To close, press it again until it latches.
You can store eyeglasses and other small items in this holder.