Honda CR-V: HondaLink® / To Set Up to Connect HondaLink® Service
Honda CR-V 2017-2026 Owner's Manual / Features / Audio System Basic Operation / HondaLink® / To Set Up to Connect HondaLink® Service
Use the following procedure to connect to the HondaLink® service.
To enable the HondaLink® service
- Select
 .
. - Select Settings.
- Select Info.
- Select the HondaLink tab.
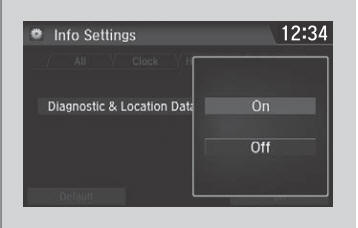
- Select Diagnostics & Location Data.
- Select On.
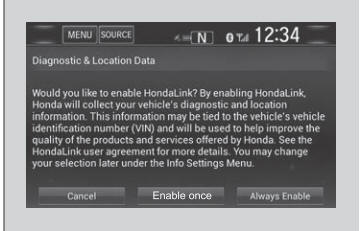
To complete the procedure, you must consent to the collection and transmission of data pertaining to your vehicle.
Enable once: Allows only one time. (Prompt shows again next time.)
Always Enable: Allows anytime. (Prompt does not show again.)
Cancel: Does not allow this consent.
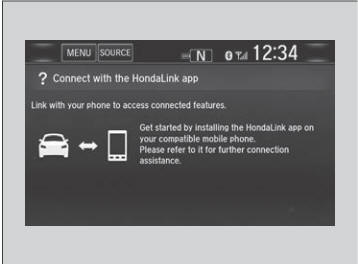
To link with HondaLink®
You can see this screen after launching HondaLink®.
* Not available on all models
 HondaLink® Menu
Places *
Displays restaurants, gas stations, Honda dealers, etc. and provides
navigation instructions to those locations via the navigation system.
Vehicle
Displays instruction messages when the vehicle needs service...
 Vehicle Information and Message from Honda Tips
Using the shortcut operation, you can quickly gain access to new messages.
In the header area, a message appears to notify you of a new message.
When the message is received, a notification ring can be heard...
Other information:
Honda CR-V 2017-2026 Owner's Manual: VSA® On and Off
This button is on the driver side control panel. To partially disable VSA® functionality/ features, press and hold it until you hear a beep. Your vehicle will have normal braking and cornering ability, but traction control function will be less effective...
Honda CR-V 2017-2026 Owner's Manual: Operating Android Auto™ with Voice Recognition
Press and hold the (Talk) button to operate Android Auto™ with your voice. Below are examples of commands you can give with voice recognition: Reply to text. Call my wife. Navigate to Honda. Play my music. Send a text message to my wife. Call flower shop...
Categories
- Manuals Home
- Honda CR-V Owners Manual
- Honda CR-V Service Manual
- How to Use the Auto High-Beam
- Oil Check
- TPMS Calibration
- New on site
- Most important about car
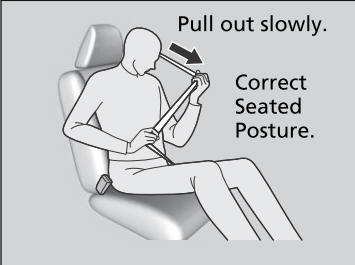
Fastening a Seat Belt
After adjusting a front seat to the proper position, and while sitting upright and well back in the seat:
Pull the seat belt out slowly.
Copyright © 2026 www.hocrv.com